Friday, 27 May 2011

Hands and Little Feet

In this post im going to talk about how i make the hands for my puppets and the feet for the little boy.


Il start of by talking about moulding and casting hands.
I first start off by making the armature for the hands using twisted wire and milliput. I make the basic size  I want withe the wire and add milliput palm for strength and to the tips to help prevent sharp wire cutting mould


After the milliput was dry i used plastercine to sculpt and make detail for the hands on top of this.


With my hands made i used the same process as i done with my boys head in my earlier post making a two part mould. After the mould was made i could then remove the plastercine from my hands leaving me with my armature hands which fit nicely into the moulds.


I then began casting by first adding a very thin layer of latex (which i made skin colour ) to the mould. I allowed it to dry and repeated this a few times to bulk it up slightly. The reason for doing this is so the latex picks up all the detail of the hands without having air bubbles on surface as it is the most important part as we can see it.

(left hand side is the thin layer wet and right is when it is dry. latex dries a lot darker so you have to judge colour carefully)


Once the layers were dry i placed the armatures back inside mould.
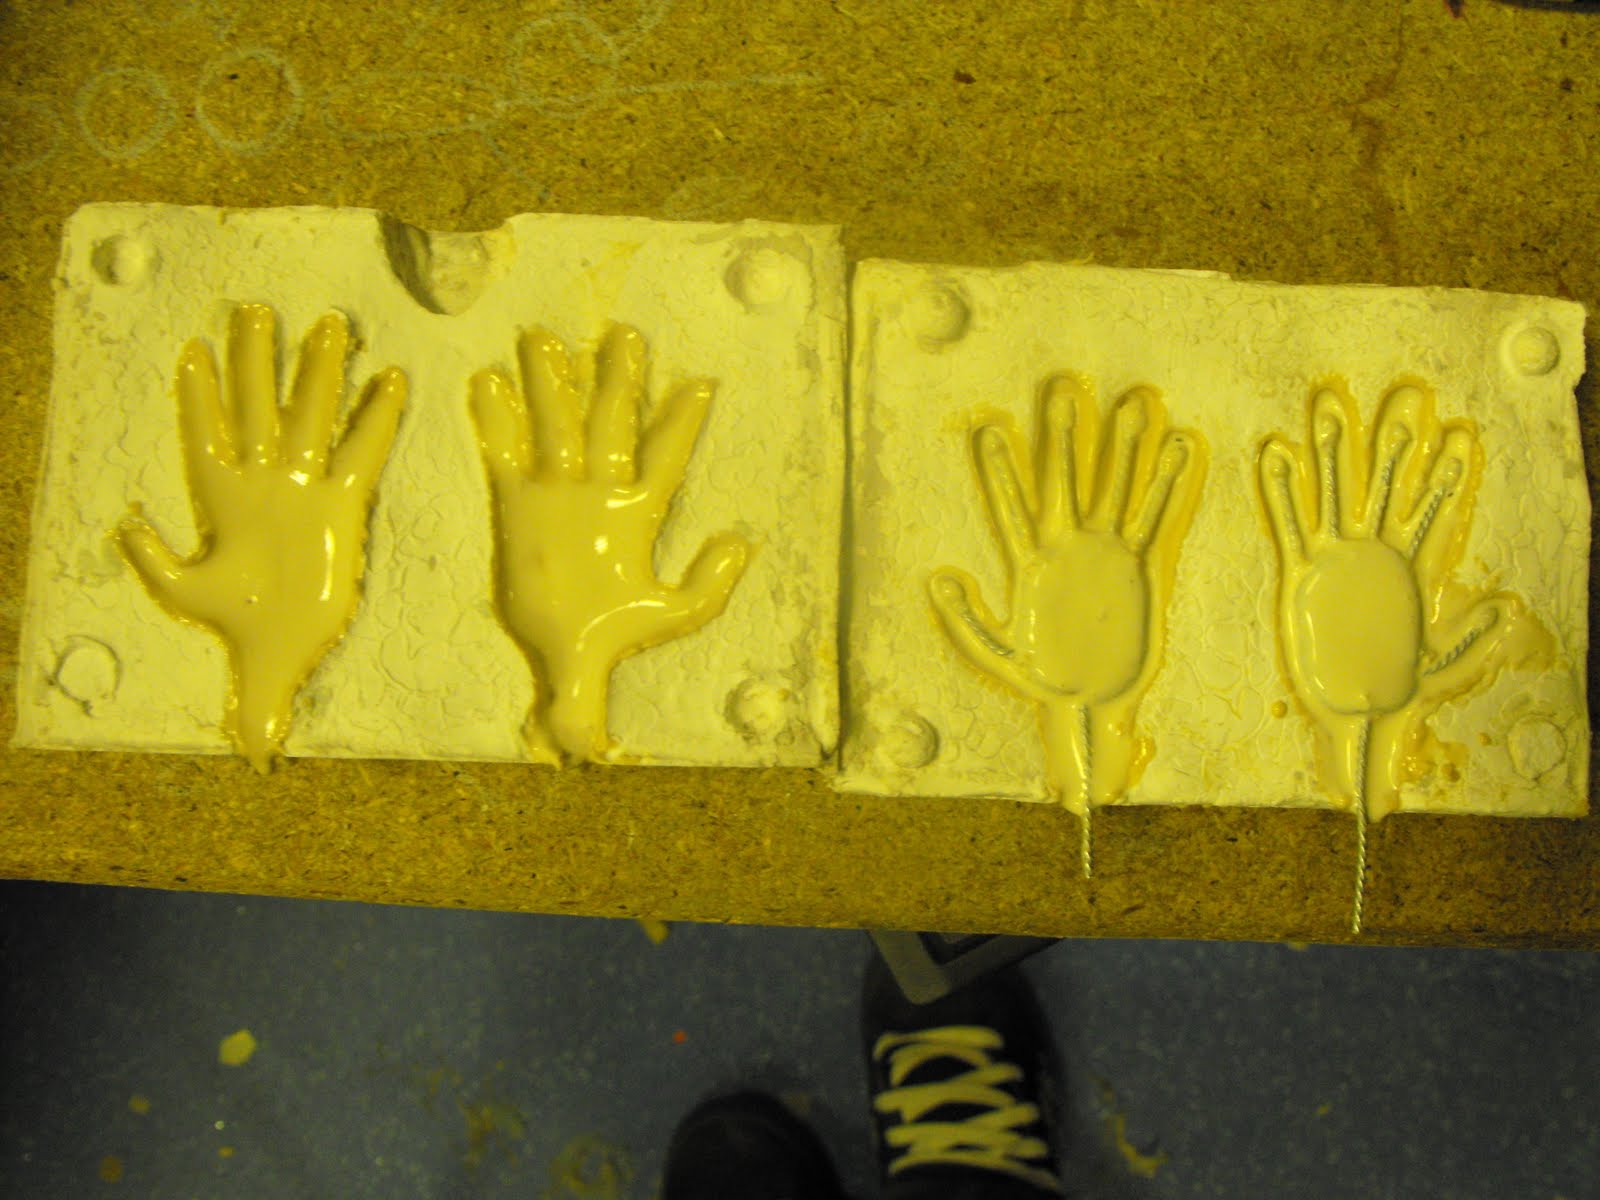


I poured more latex onto hands then closed mould. I then poured more latex into the wrist and used clamps to keep it all together


When dry I removed hands from moulds


you are left with a seem around the hands which need to be carefully cut off with scissors


The final hands look something like this.
I decided to make my hands in silicone in the end to match my boys head and because it is easier to work with and a nicer finish. I just reused the same moulds and process but just added silicone instead of latex.

For the boys feet it was pretty easy as i didnt need to make them detailed i just needed shape and function as they were going to be under his onesie


I used the replacement feet i made for the boys armature and added metal foot plates. I done this so i had the choice of using magnets as well as tie downs to stand me puppet on the set. For the tie downs i drilled a hole in the foot and glued on a nut so i could screw threaded bar in to tie him down to the set.

 To finish I covered the armature in milliput to get the shape i wanted and to give the feet strength.


Wednesday, 18 May 2011

Head Sculpt

To start the head sculpt  for casting I first bulked out tinfoil on some wire as a base for the head.


I then began to sculpt the head with plastercine 


To begin moulding I first had to make a two part mould. I done this by first building clay half way up my head sculpt


Once this way done I boxed the clay in and cleaned up my sculpt ready to add the plaster. I made key holes to make it easier to take apart once cast.


I added clay around the outside of the box to stop any plaster leaking out.


I sprayed the sculpt in wax to be able to take it apart from the plaster once set. I then mixed the plaster and poured it over the sculpt.


Once set i removed sculpt and repeated the process above creating the second part of the mould.


This is what the face side of the finished mould looked like


I decided I wanted to make the head from silicone. To do this I mixed the two parts to create silicone and added small amount of paint to give hair colour. 


I then painted the silicon into the mould where the hair would be. I done this first as the hair was darker then the skin, after it dried I mixed more silicone with a skin colour  I made up and applied it to the rest and filled up the mould. 


Once set I took mould apart and trimmed away the seem line.


The final head looked like this.
I added plastic circles for the eyes i cut from back of some googly eyes I bought and made paper pupils so they could move around and be animated. I am also using paper mouths as he only has very little expressions and no lip sync.

I also made a replacement head for the bath scene as i needed to cover it in bubbles and didn't want to ruin the head

Mum and Dad Armatures

The armatures for the parents were a lot easier  then for the boy. The parents are only seen from the waist up in the case of the mum and neck down for the dad as he will just be sitting.

For the mum i twisted wire and used KNS at the waist. The mum is not going to be animatable so her armature will just be made very simply


To bulk out the legs I wrapped them in tin foil. I done this as I'm going to use Sculpy to make her legs and i needed it to stick to the foil and be able to be put i the oven so foam would not work.


I made the legs from sculpy baked it in the oven till hard and finally painted them. i added foam to top of legs to bulk out her bum.


For the dad I re-used an armature I bought for a character I made last year. He didn't need an armature this complicated but to save time i just used this one as it happened to be around the right size as i needed.


same as the boy I began padding out with blue foam.


I padded the rest of the body with scraps of foam I had.


To help give the padding a smoother finish under the clothes i wrapped it all in a thin foam so it would look more natural.

Boy Armature Build

Well as you can tell I haven't done anything on this blog for a long time. Reason being is I've been really busy actually trying to make and film everything I'm going to put up here, but I'm well on my way so I decided i better show my progress.

This is how i went about building the armatures for the little boy.

I started of by drawing to scale how the armature would look under the puppet so i could measure the sizes of wire and KNS (square metal tubing) I would need correctly.


After i had my plans down i twisted some aluminium wire and cut it to length. I covered them with a heat shrink tubing to help them from  breaking so easily when animating.


I also cut my KNS to size also.


I decided to make every limb replaceable so as if i encountered any problems or breaks along the way they would be easier to fix if needed. I done this by sliding smaller sized KNS into slightly bigger pieces where the limbs needed to come apart. I also added rig points in case they were needed.

Once I had everything cut so size i glued all the parts together with a two part epoxy resin glue 


To give extra strenght to some areas I used milliput which is a two part epoxy putty


After everything was set and dry the next stage was to pad the puppet out. I started of by adding some blue foam. It is a stiff foam which i carved to the shape i wanted. I used this as a base on the chest and waist so there would be something solid to hold onto while animating. I also made sure to leave holes for the rig points.


To bulk out the rest of the body i used a soft foam to allow flexibility in the joints. i cut the foam to the basic shape i waned and stuck it together using contact adhesive.


Final padded out puppet.